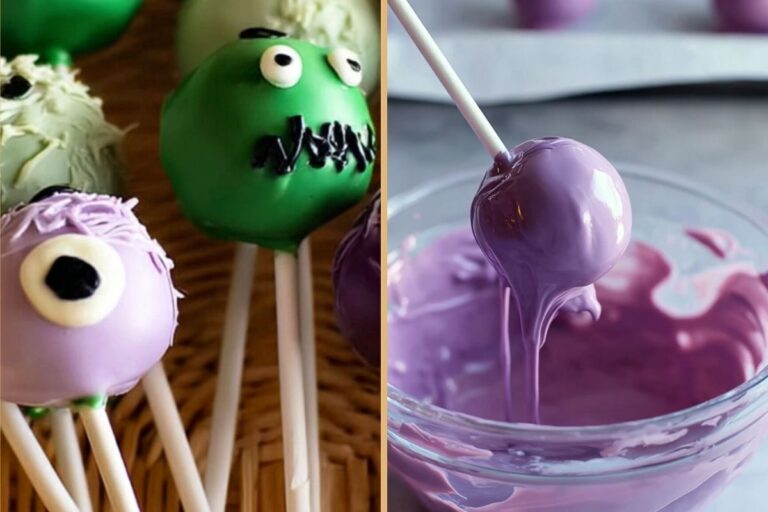
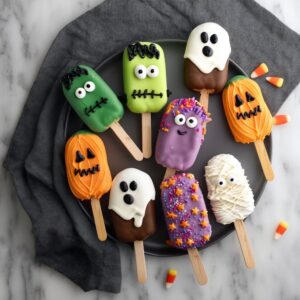
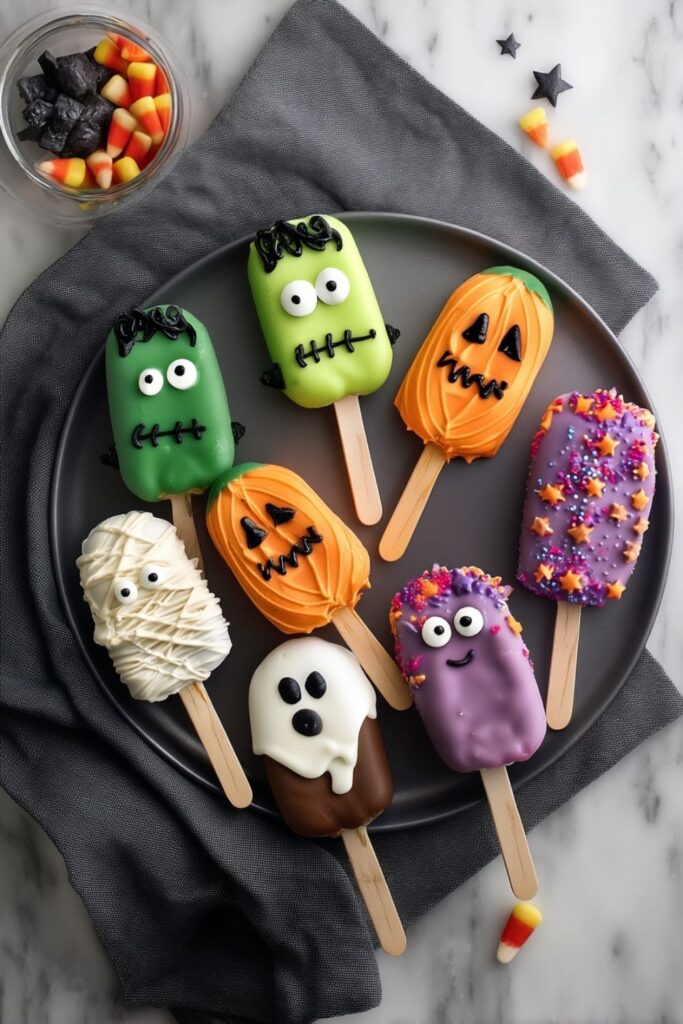
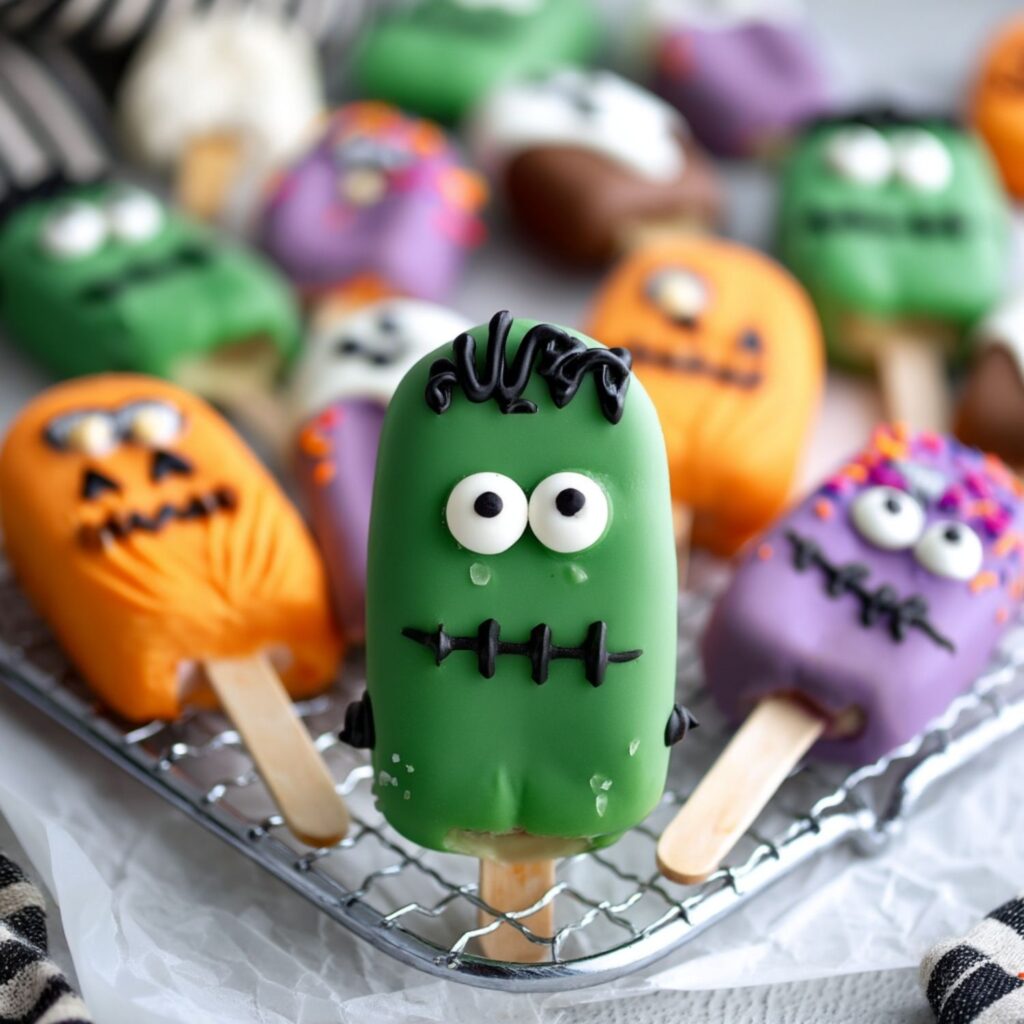
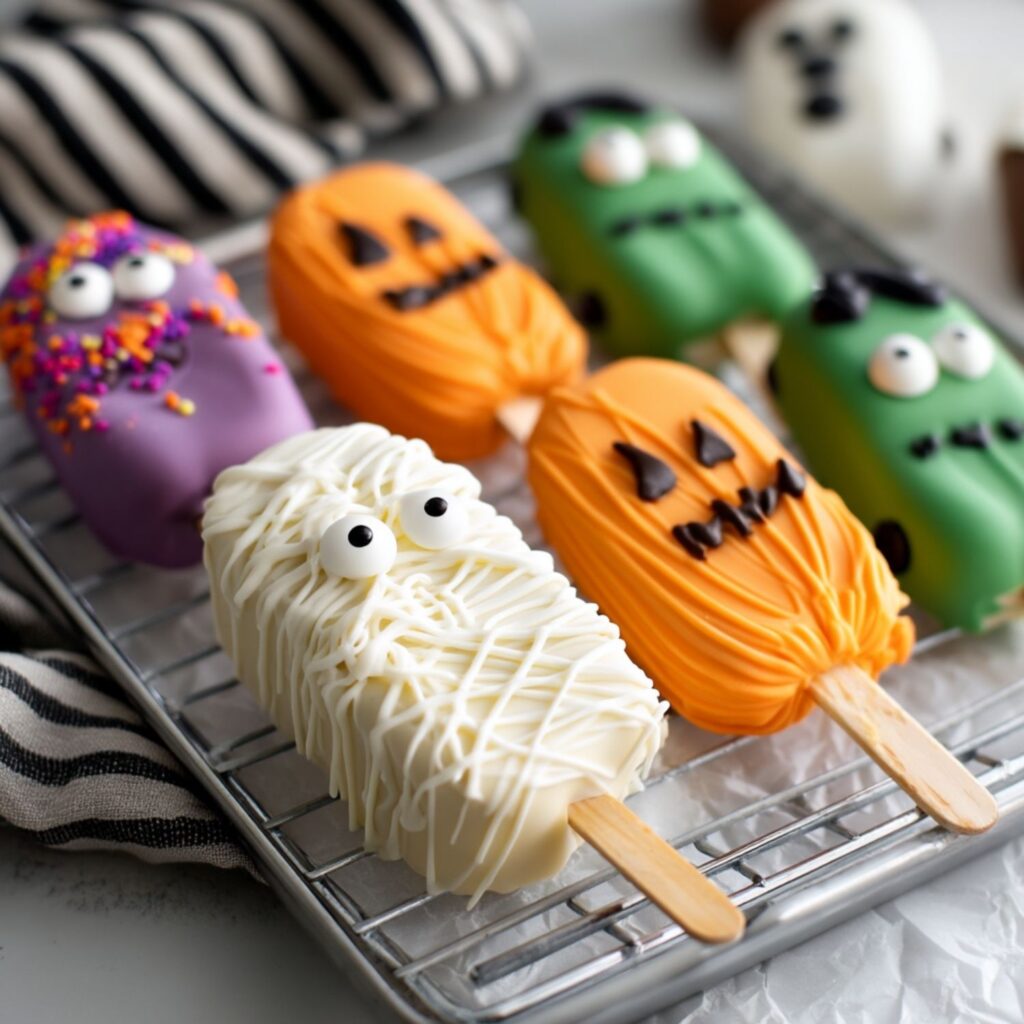
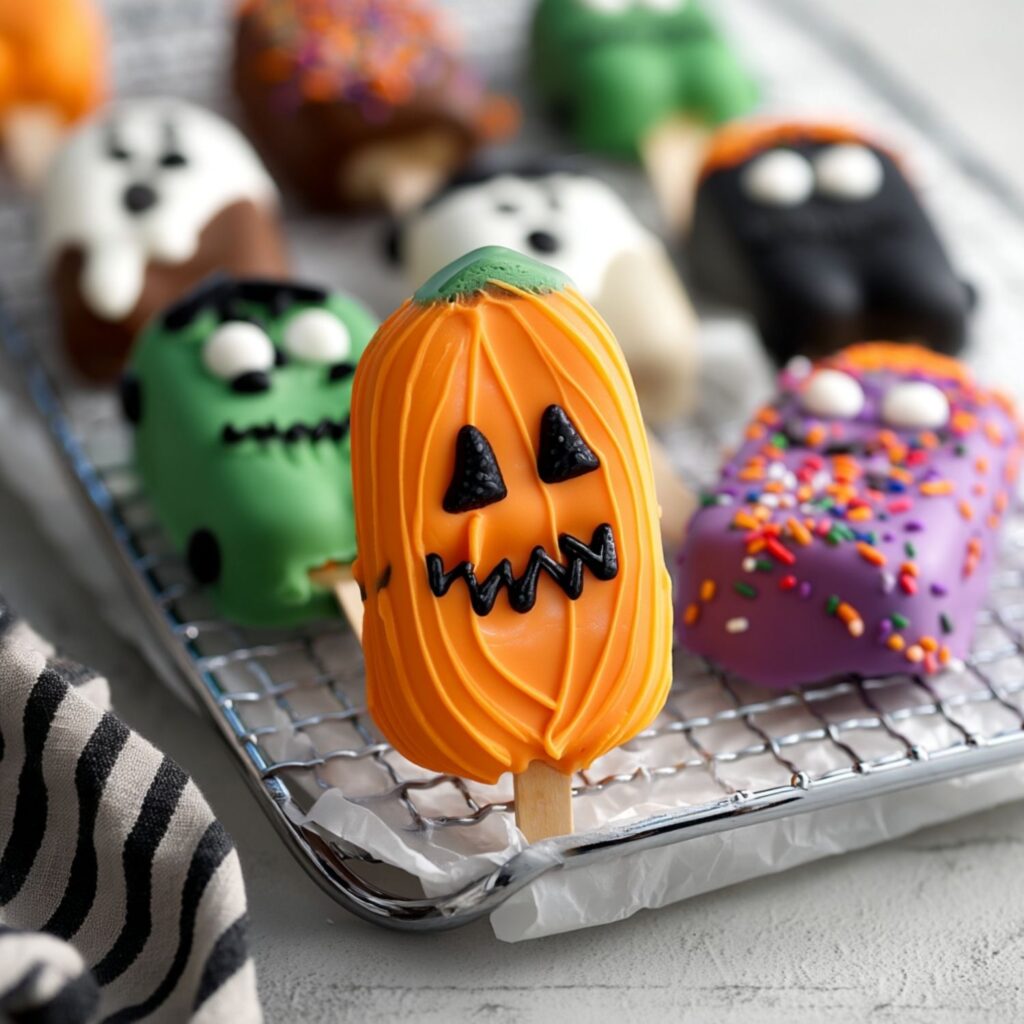
Halloween is when sugar puts on a costume, and I’m here for it. These Halloween cakesicles—basically cake balls in disguise—look impressive but are easy enough to pull off. The real trick is choosing between cute or creepy.
I once brought a batch of Halloween cake pops to a party, and the candy bowl didn’t stand a chance. Kids grabbed ghosts, parents grabbed mummies, and by the end of the night the tray was empty. Turns out spooky cakesicles are equal-opportunity snacks.
Display them with autumn-themed cake pops or go wild with coffin cake pops and Halloween cake pucks. Either way, these Halloween themed cakesicles deliver the fun without the stress. I’ll skip the 2 a.m. vampire fangs, thanks.
Halloween Cakesicles
EQUIPMENT (PAID LINKS)
- Stand mixer with paddle attachment
- Cakesicle mold (or roll into balls if you don’t have one)
- Popsicle sticks
- Small spatula
- Cookie sheet
- Tall skinny jar
- Silicone mat
Ingredients
- 1 box vanilla cake mix plus ingredients listed on the box
- 1/4 cup powdered sugar
- 1/2 teaspoon vanilla extract
- 12 ounces candy melts divided into colors if desired
Instructions
- Bake the Cake: Prepare and bake the cake according to the package directions. Bake just until set so the cake stays very moist.1 box vanilla cake mix
- Mix the Dough: While still hot, transfer the cake into the bowl of a stand mixer. Add powdered sugar and vanilla extract. Mix on low until the mixture becomes dough-like and holds together when pressed.1/4 cup powdered sugar, 1/2 teaspoon vanilla extract
- Shape the Cakesicles: Press the dough firmly into cakesicle molds, smoothing the tops with a small spatula. Insert a popsicle stick into each one.
- Freeze to Set: Place the filled molds in the freezer for 10–15 minutes. Once firm, carefully unmold by pressing gently while holding the stick. Place on a cookie sheet and return to the freezer to keep chilled while finishing the batch.
- Melt the Candy Coating: Melt candy melts in a microwave or double boiler according to the package directions. Pour into a tall skinny jar for easier dipping.12 ounces candy melts
- Dip and Coat: Dip each chilled cakesicle into the melted candy. Gently shake off the excess, then place upright on a silicone mat to harden.
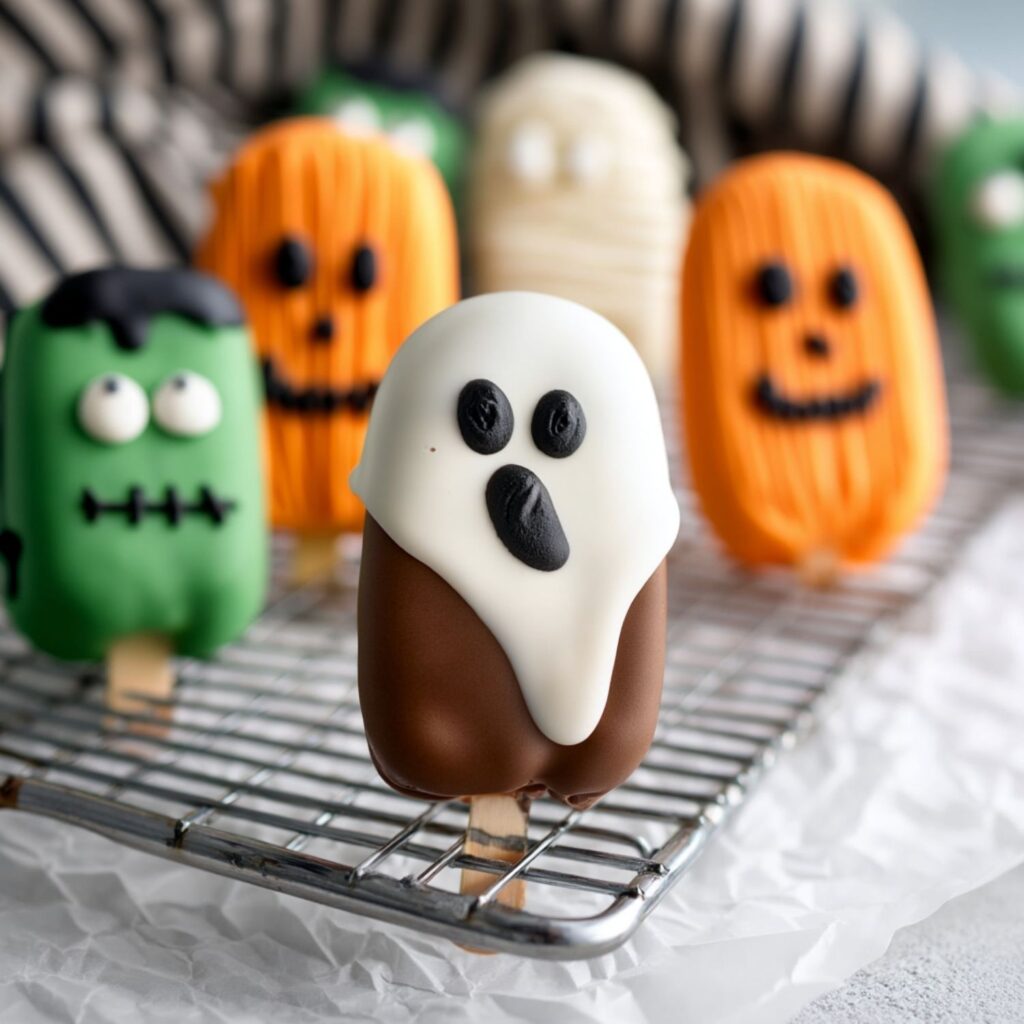
- Decorate for Halloween: Use extra candy melt colors to add mummy stripes, monster eyes, ghost faces, or whatever spooky style you like. Add details while the coating is tacky so they stick.
- Serve or Store: Enjoy immediately, or package individually in bags for gifting. Store in an airtight container at room temperature for up to 3 days.
Halloween Cakesicles Without the Headache
Cake Mix Shortcuts
Yes, you can bake a cake from scratch, but if you’re already juggling costumes, candy, and a dog that won’t stop barking at the inflatable ghost next door, just use the boxed stuff. Nobody at the party is taste-testing your cake pops against grandma’s sponge. Any flavor works—vanilla, chocolate, even red velvet if you want to get dramatic.
Candy Melt Drama
Candy melts are supposed to be smooth and glossy, but sometimes they act like stubborn toddlers. If they’re too thick, stir in a teaspoon of vegetable oil or coconut oil until they loosen up. Microwaving in 30-second bursts saves you from the tragic clump-of-chocolate moment.
No Mold, No Problem
Don’t own a fancy cakesicle mold? Roll the cake mixture into balls like classic cake pops. They might not look coffin-ready, but once they’re dipped in candy coating, nobody cares. A stick plus sugar equals dessert on a stick—end of story.
Decoration Hacks
You don’t need a degree in edible arts to pull this off. Piping bags work, but a plastic sandwich bag with the corner snipped off does the job. Candy eyeballs from the baking aisle are instant monster faces, and if your mummy looks more like a lumpy snowman, call it “abstract.” The scarier they look, the easier you can pass it off as intentional.
Storage Wisdom
Room temp works for a few days, but if you’re planning ahead, freeze the finished cakesicles. Just wrap them individually and toss them in a freezer bag. Thaw at room temp before serving. Pro tip: hide a few in the back of the freezer if you actually want leftovers.