I finally tried Nutella Peanut in America, and yes, curiosity immediately became a kitchen problem. So I wanted to remake it at home.
This homemade Nutella peanut spread is my attempt to figure out how to make Nutella Peanut at home without hunting down another jar.
It’s a Nutella recipe easy enough for a craving, but just dangerous enough near a spoon. Homemade snacks rarely behave this well.
Homemade Nutella Peanut Spread Recipe
Ingredients
- 10 ½ ounces roasted unsalted peanuts
- 5 ¼ ounces milk chocolate chopped
- 2 tablespoons unsweetened cocoa powder
- 3 tablespoons powdered sugar
- 1 generous pinch salt
- 1 to 2 tablespoons peanut oil or sunflower oil
- ½ teaspoon vanilla extract optional
- ¼ cup chopped peanuts optional, for a crunchy version
Instructions
- Make Peanut Butter: Add the roasted peanuts to a food processor and blend in short bursts. At first, they will turn into crumbs, then a thick paste, and finally a smooth peanut butter after about 5 to 10 minutes. Stop every so often to scrape down the sides with a spatula and keep the motor from overheating.10 ½ ounces roasted unsalted peanuts
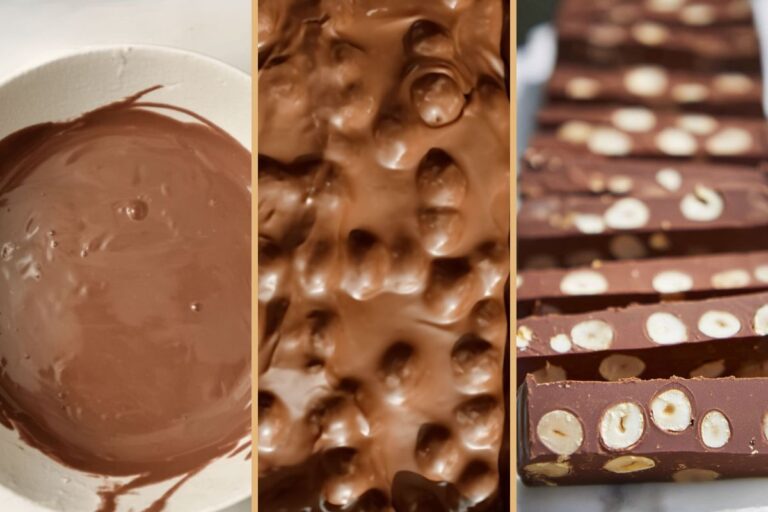
- Melt Chocolate: Melt the chopped milk chocolate in the microwave in 30-second bursts, stirring after each round so it does not burn. You can also melt it in a double boiler if you prefer a slower, gentler method.5 ¼ ounces milk chocolate
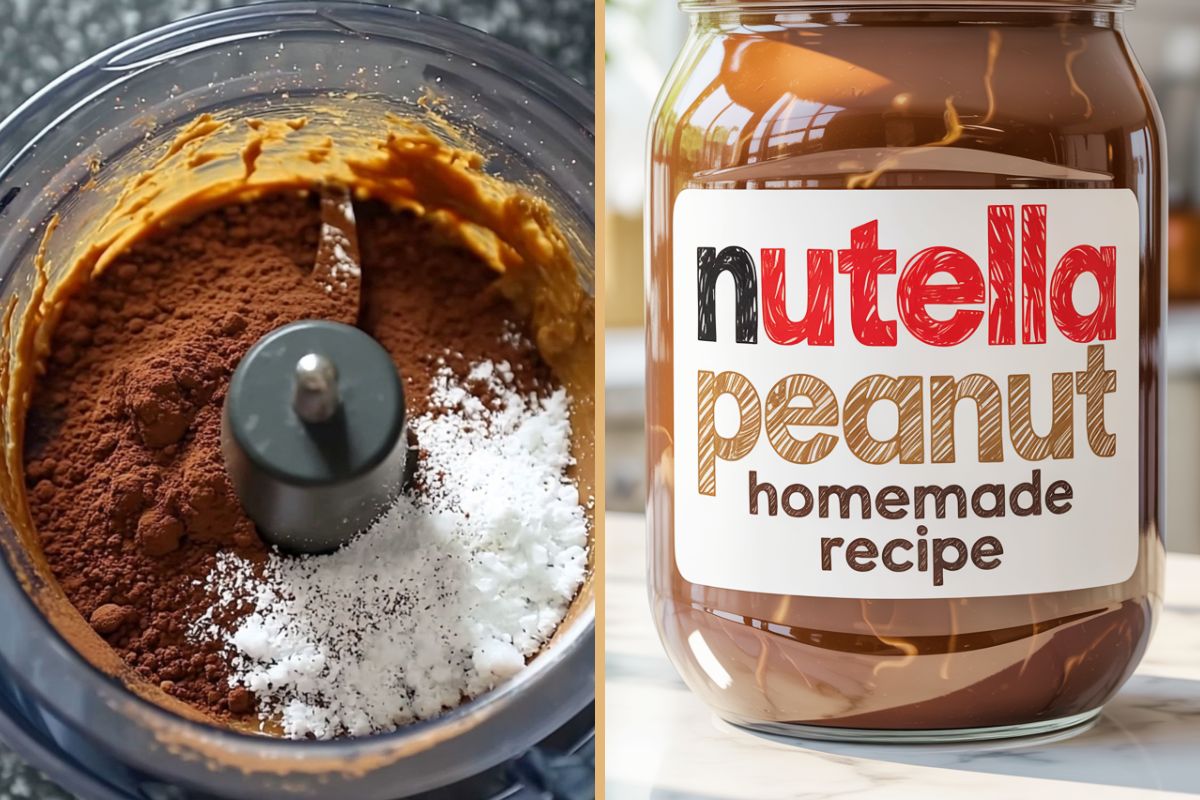
- Add Dry Ingredients: Add the unsweetened cocoa powder, powdered sugar, and salt to the peanut butter in the food processor. Blend for a few seconds until the dry ingredients are fully mixed in.2 tablespoons unsweetened cocoa powder, 3 tablespoons powdered sugar, 1 generous pinch salt
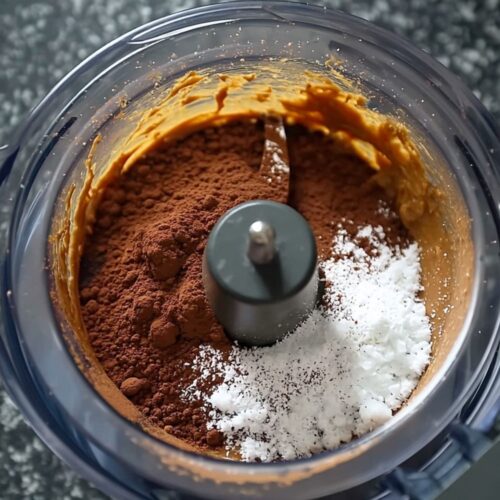
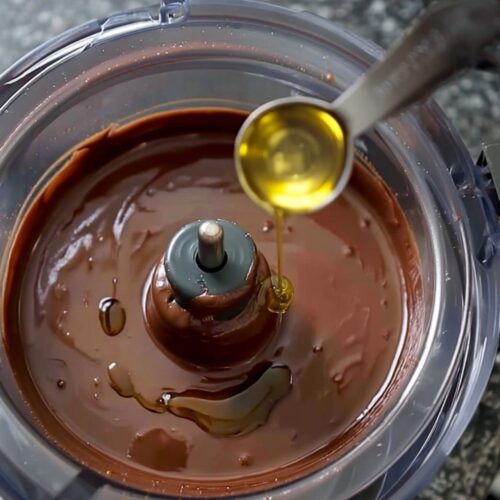
- Add Chocolate and Oil: Pour the melted chocolate into the food processor. Add 1 tablespoon of peanut oil or sunflower oil, along with the vanilla extract if using.1 to 2 tablespoons peanut oil or sunflower oil, ½ teaspoon vanilla extract
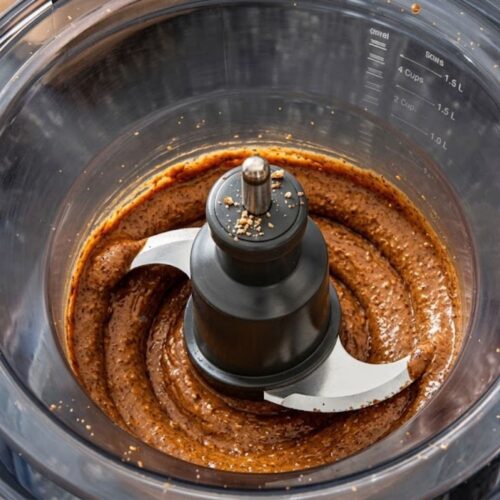
- Blend Until Smooth: Blend for 1 to 2 minutes, until the spread looks smooth, glossy, and creamy. If it seems too thick, add the second tablespoon of oil and blend again until it reaches a soft, spreadable texture.
- Make It Crunchy: For a crunchy version, stir in the chopped peanuts by hand after the spread is fully blended. Do not blend them in unless you want them to disappear, which would be tragic but still edible.¼ cup chopped peanuts
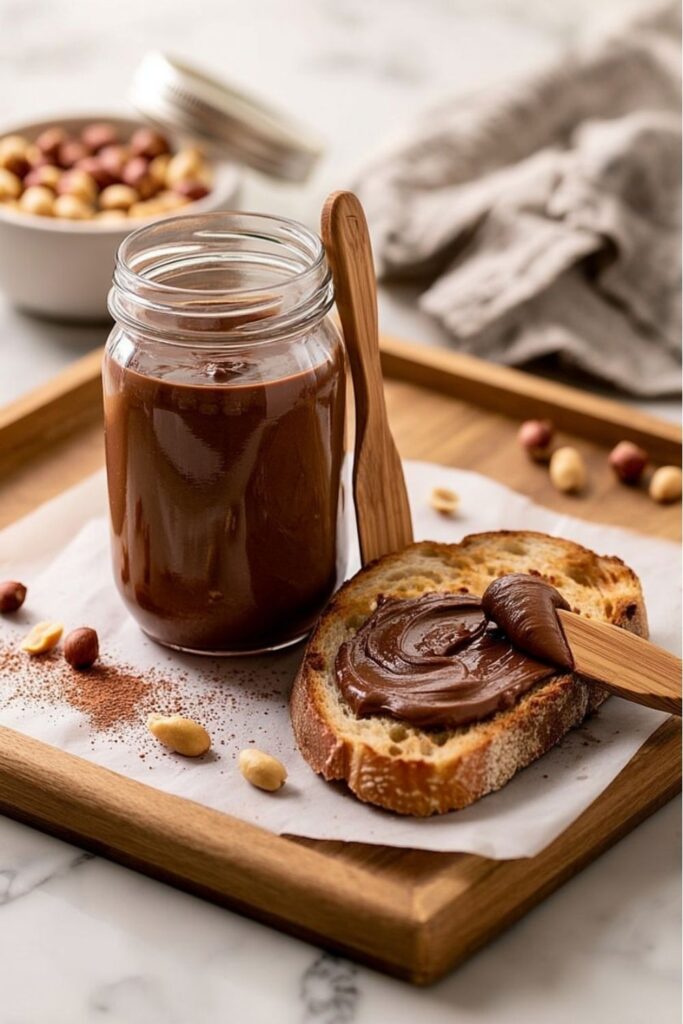
- Jar and Rest: Pour the spread into a clean glass jar. It may look a little thin at first because it is warm, but that is normal. Let it sit at room temperature for a few hours, or overnight, until it thickens into a creamy, spreadable consistency.
- Store: Keep the homemade Nutella Peanut spread in a sealed jar in the pantry for up to 2 weeks. If your kitchen is very warm, store it in the refrigerator, but let it sit at room temperature before spreading because it will firm up.
Homemade Nutella Peanut Spread Recipe, Because Apparently One Jar Wasn’t Enough
This is the part where we make the recipe easier, smoother, and less likely to turn your food processor into a tiny screaming machine. Worth it? Annoyingly, yes.
Use Unsalted Roasted Peanuts
Unsalted roasted peanuts give you the most control over the flavor. Salted peanuts can work, but then you’re letting the peanut bag make decisions for you, and honestly, it has not earned that power.
Let the Food Processor Rest
Peanuts take a few minutes to turn from sad crumbs into creamy peanut butter, so don’t panic too early. Stop and scrape the sides often, and give the motor short breaks. Burning out a food processor for a spread is dramatic, even for dessert.
Powdered Sugar Is Not Optional
Use powdered sugar, not regular granulated sugar. Regular sugar will not melt properly into the spread, so you’ll end up with a gritty texture. Crunchy is cute when it’s peanuts, not when it’s sugar ambushing your teeth.
Milk Chocolate Gives the Best Candy-Bar Flavor
Milk chocolate makes this taste closer to that sweet, creamy Nutella Peanut vibe. If you want a deeper chocolate flavor, use half milk chocolate and half dark chocolate, but don’t go too dark unless you want the spread to feel a little too grown-up for toast.
Add the Oil Slowly
Start with 1 tablespoon of peanut oil or sunflower oil, then blend and check the texture before adding more. You can always thin it out, but fixing a spread that got too loose is where the kitchen starts asking uncomfortable questions.
Vanilla Makes It Taste More Finished
The vanilla is optional, but it helps round out the chocolate and peanut flavor. It’s one of those tiny additions that makes people think you did something fancy, when really you just opened a bottle and behaved normally for four seconds.

Make It Crunchy at the End
For a crunchy version, stir chopped peanuts in after blending. Don’t add them earlier unless you want the food processor to erase all your crunchy dreams. Fold them in by hand and pretend this was a sophisticated texture decision.
Use a Clean, Dry Jar
Make sure the jar is completely clean and dry before adding the spread. Any water hanging around can mess with the texture and storage life, which is very annoying considering this is supposed to be the fun part.
Let It Cool Before Judging It
Right after blending, the spread will look thinner because it’s warm. Let it sit at room temperature for a few hours, or overnight, before deciding whether the texture is right. Hot chocolate spread lies. Give it time.
Store It in the Pantry, Unless Your Kitchen Is Hot
A sealed jar can stay in the pantry for about 2 weeks if your kitchen is cool. If your kitchen runs warm, store it in the fridge, but let it sit out before using because cold chocolate peanut spread spreads about as willingly as sidewalk cement.
Use It Beyond Toast
Toast is obvious, but this is also great on pancakes, waffles, bananas, pretzels, graham crackers, or straight from the spoon when nobody is asking questions. It also works as a filling for cookies or sandwich crackers if you want homemade snacks that look like you tried harder than you did.