These cute 4th of July treats are my kind of party dessert: low effort, high applause, and sticky enough to feel homemade.
I made these once in a rush before a cookout, and now they’re requested like I own a bakery. Ten minutes total, absurdly enough.
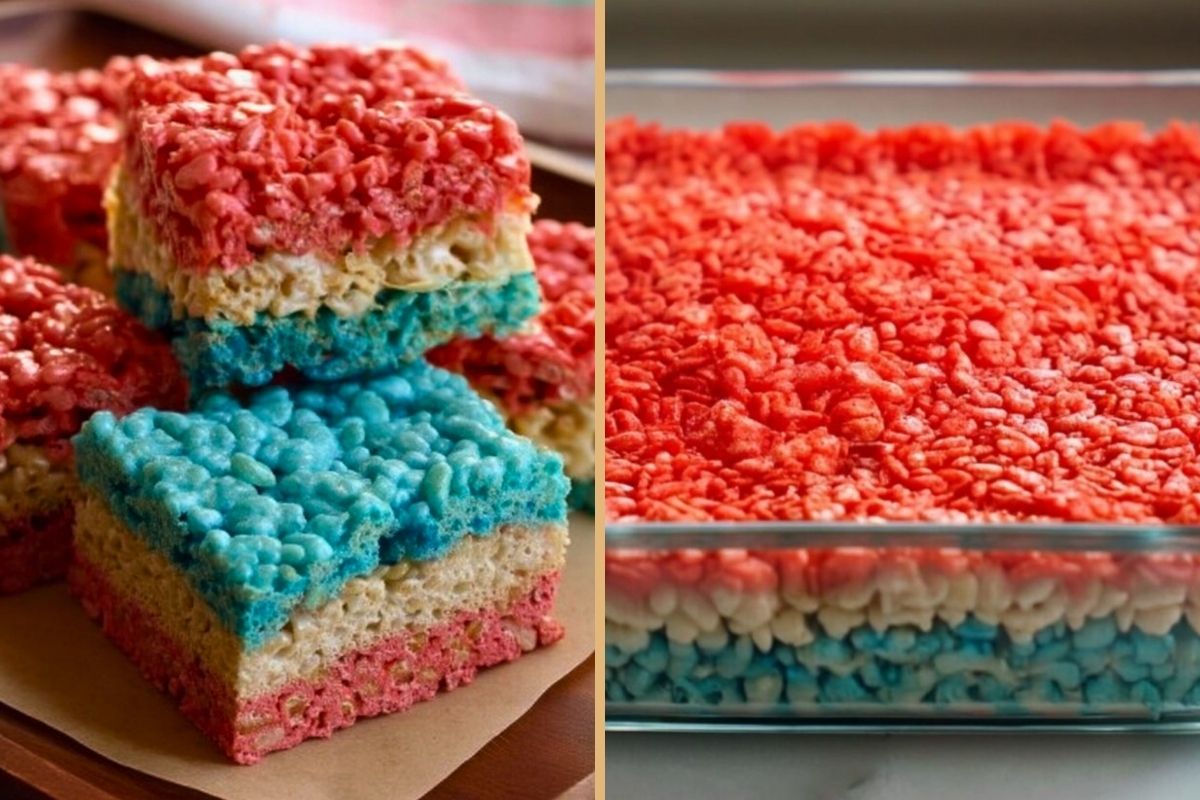
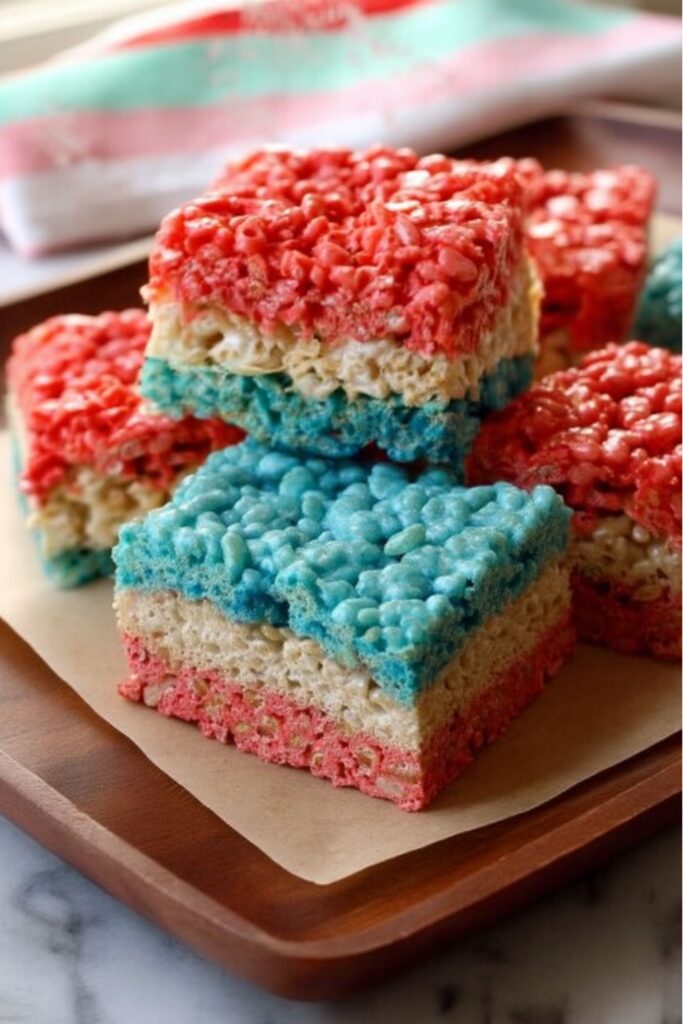
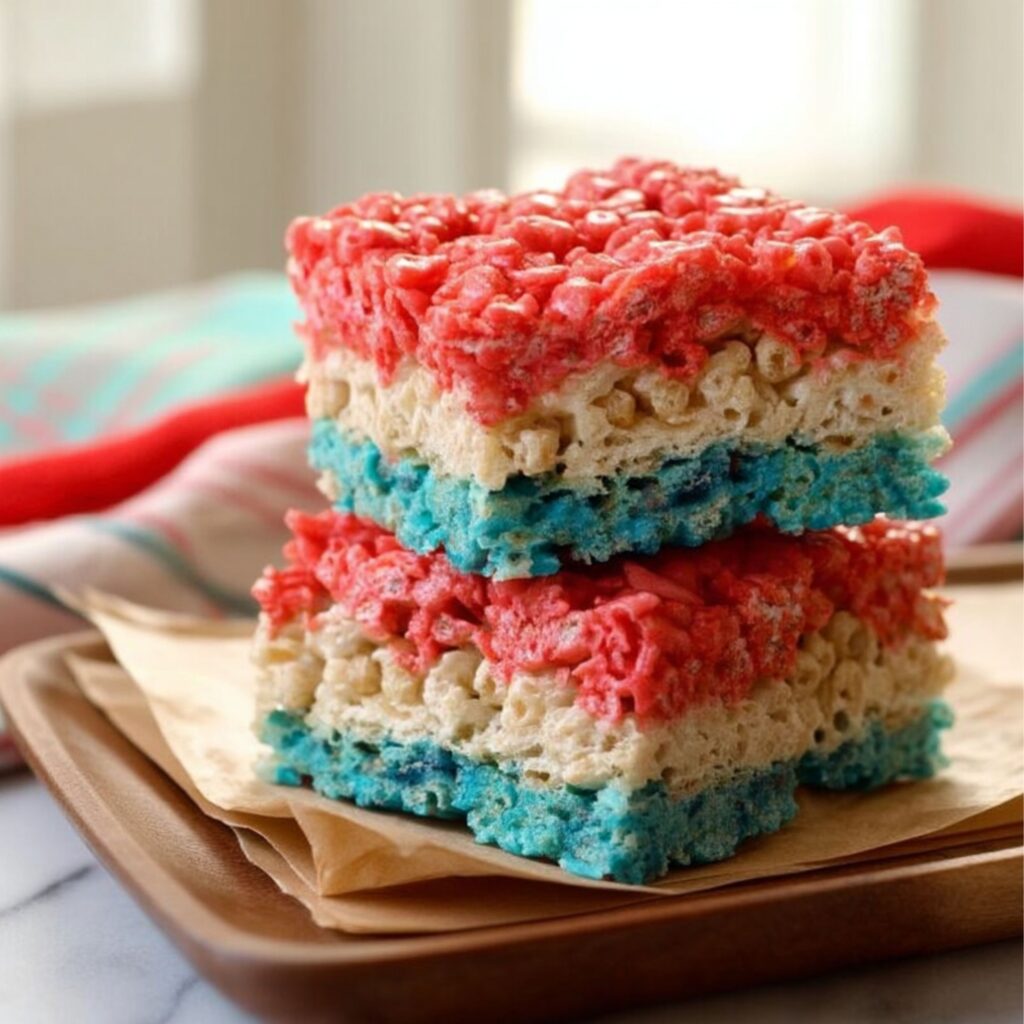
Think red, white, and blue rice crispy treats meet Independence Day treats, with zero frosting drama. That is my kind of patriotism.

4th of July Rice Crispy Treats
EQUIPMENT (PAID LINKS)
- 9×9-inch baking pan
- 3 microwave-safe bowls
- Kitchen scale
- Wax paper
Ingredients
- Nonstick cooking spray
- 6 cups Rice Krispies cereal divided
- 16 ounces marshmallows divided into 3 equal portions
- 3 tablespoons butter divided
- Blue gel food coloring
- Red gel food coloring
Instructions
- Prep the Pan and Ingredients: Spray a 9×9-inch baking pan with nonstick cooking spray. Divide the Rice Krispies cereal into three portions of 2 cups each. Divide the marshmallows into three equal portions, about 5 ⅓ ounces each.Nonstick cooking spray, 6 cups Rice Krispies cereal, 16 ounces marshmallows
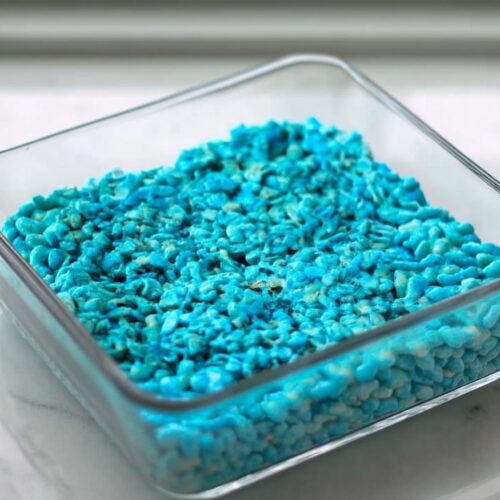
- Make the Blue Layer: Add one portion of marshmallows and 1 tablespoon butter to a microwave-safe bowl. Microwave in 20- to 30-second bursts, stirring between each one, until the marshmallows are melted and smooth. Stir in blue gel food coloring until the color looks bright and even.3 tablespoons butter
- Add the Blue Cereal Layer: Add 2 cups Rice Krispies cereal to the blue marshmallow mixture and stir until the cereal is evenly coated. Press the mixture into the bottom of the prepared pan. Use a piece of wax paper or lightly greased hands so you do not become permanently attached to the dessert.Blue gel food coloring
- Make the White Layer: Add the second portion of marshmallows and 1 tablespoon butter to a clean microwave-safe bowl. Microwave in 20- to 30-second bursts, stirring until melted and smooth. Do not add food coloring to this layer.
- Add the White Cereal Layer: Stir 2 cups Rice Krispies cereal into the plain marshmallow mixture until evenly coated. Gently press the white layer over the blue layer, spreading it evenly without packing it down too hard.
- Make the Red Layer: Add the final portion of marshmallows and the last 1 tablespoon butter to a clean microwave-safe bowl. Microwave in 20- to 30-second bursts, stirring until melted and smooth. Stir in red gel food coloring until the color is bright and evenly mixed.Red gel food coloring
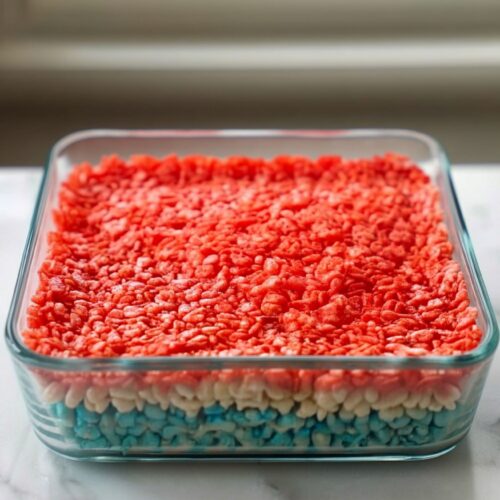
- Add the Red Cereal Layer: Stir in the final 2 cups Rice Krispies cereal until fully coated. Press the red mixture evenly over the white layer to finish the red, white, and blue stack.
- Cool and Slice: Let the treats cool completely at room temperature until firm. Cut into 12 squares and serve. Store leftovers in an airtight container at room temperature for 2 to 3 days.
4th of July Rice Crispy Treats That Won’t Make You Regret Volunteering for Dessert
This is the kind of recipe that looks like you tried harder than you did. Which, frankly, is the whole point.
Use Gel Food Coloring, Not the Sad Watery Stuff
Gel food coloring gives you brighter red and blue layers without making the marshmallow mixture weird and thin. Liquid food coloring works in a pinch, but if you want those patriotic layers to actually look patriotic and not like a faded school art project, gel is the move. A little goes a long way, so don’t empty half the bottle unless you want cartoon-level commitment.
Grease Everything That Touches the Marshmallow
Spray the pan, the spatula, and even your hands if you’re pressing the layers down directly. Marshmallow is basically edible glue with better branding, and it will cling to everything like it pays rent there. Nonstick spray is not optional unless you enjoy wrestling with dessert.
Don’t Press the Layers Too Hard
You want the layers packed enough to hold together, but not so much that the treats turn into patriotic bricks. A gentle press with wax paper does the job without crushing all that nice crispy texture. The firm is good; cement block is not the goal.
Make Each Layer Separately
Yes, it’s slightly annoying. No, you should not melt everything at once and hope for the best. Making each color layer separately keeps the texture even and stops the colors from turning into a suspicious purple-gray situation. This is one of those tiny extra steps that saves the whole dessert from looking haunted.
Mini Marshmallows Melt Faster
Regular marshmallows work, but mini marshmallows melt more quickly and evenly, which is helpful when you’re making three separate layers. If you only have the big ones, just stir patiently and pretend this was your cardio for the day.
Butter Makes Them Better
You can use margarine if that’s what you have, but butter gives these a richer flavor and less of that “cafeteria dessert table” energy. Salted or unsalted both work, though salted butter adds a tiny bit of balance to all that sweet marshmallow chaos. I’d use salted butter and not overthink it.
Use a 9×9 Pan for Thicker Treats
A 9×9-inch pan gives you nice, thick squares with clear layers. A 9×13-inch pan works only if you double the recipe, otherwise the treats come out thin and a little tragic. Nobody wants a Rice Crispy Treat that looks like it gave up.
Wax Paper Is Your Best Friend
Place a sheet of wax paper over each layer before pressing it into the pan. It keeps your hands clean and helps spread the mixture evenly without pulling up half the layer you just made. This is the lazy genius move that makes you look organized.
Add Sprinkles If You’re Feeling Extra
Red, white, and blue sprinkles can go on top before the final layer fully sets. Don’t stir too many into the hot marshmallow mixture, though, because some sprinkles bleed color and suddenly your festive dessert looks like it lost a fight with a marker set.
Store Them at Room Temperature
Keep these in an airtight container at room temperature for 2 to 3 days. The fridge makes them hard, dry, and weirdly sad, so don’t do that unless you enjoy chewing with purpose. For softer treats, add a slice of sandwich bread to the container and let it do its little kitchen magic.
Cut Them With a Greased Knife
A lightly greased knife makes slicing so much easier. You’ll get cleaner squares and less marshmallow drag, which sounds dramatic but is absolutely a real thing. Clean cuts make these look party-ready instead of hacked apart during a snack emergency.